Dragon Quest Battle System — Part I
One of the franchises that I like is Dragon Quest. I got into it pretty late in the series, but the atmosphere, music and the characters stuck with me. So, after wanting to work on the battle system of early JRPGs I decided to work on the one of the original Dragon Quest.
It’s a good stepping stone. I plan to work on the battle system from Final Fantasy since they are the natural evolution of this one. It’s in the original Dragon Quest for the NES where everything began. It’s amazing how much of the core remains today.

So, how do we approach building the battle system? Well, let’s look at the basic battle loop.
Basic battle loop:
- Enemy Appears
- Player picks a command
- Command is executed
- If enemy is dead
-> Show battle results - If player is dead
-> Show Game over - Both are alive, go back to [2]
The whole thing if you think about it a fight between two groups. Each turn they pick targets and exchange hits until all members of a group dies.
The core of everything is my Command class. A command is something you’ll pick in the menu and execute on a target.

With that our next step is making the class that will be the using the commands. Note that Character can either be our playable heroes or our foes. This way we can add Commands to a character. So you can have the Magic user having the Spell command but the warrior having a Skill or Attack if you want. This already creates a pretty easy to expand base.

Next, I made a Group class that will contain an array of Characters. This makes it easier if you want a spell to target all enemies or allies and so on.

The final thing for this entry is our StateBattle class which will control the flow between states.
So in the Battle’s start method, I create the characters, their commands and also put them in their respective groups. Then I create the WindowLog you see at the bottom so we can keep track as the battle moves forward.

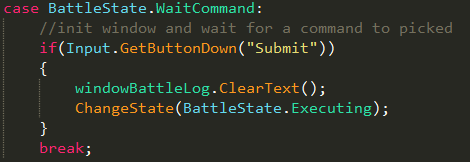
On the Initialize state, we show a message indicating that the enemy showed up and it’s ready for battle. Note that we could have custom messages for each enemy. After that, we switch to another state where we’ll wait for the player to choose a command.

Since we don’t have the menu to pick a command yet we’ll consider that if the player presses enter, he’s choosing to attack the enemy. We’ll execute the player’s choice to Attack and will also consider that the enemy is attacking him. In each case, we’ll send that message to the WindowLog to display it.


Once the enemy dies, we wait for a player’s input to show the results of the battle.

This is how it looks in the end:
That’s it for the first part in this series. On the next part I’ll be adding the other windows so we can see our players health and properly choose the command to attack.
Originally published at https://www.tumblr.com on November 10, 2016.
